Sometimes when we go to the ocean we'll bring a pinwheel along and watch the wind chase through it. The store-bought pinwheel we had has since become tattered so I decided we'd make another one ourselves.

This was fun and easy to do - you should make one, too!
Here's what you'll need:
 :: Glass of water
:: Some watercolor paints (we used these amazing Aquacolor crayons)
:: 1 sheet of watercolor paper cut to 7" x 7" in size
:: Paintbrush
:: 12 inch wooden dowel
:: 1 wooden bead (I have two pictured, but ended up using only one)
:: 1 ball pin (I used one from my sewing stash)
:: Scissors
:: Ruler
:: Pencil
:: Hammer
:: Small nail (not pictured)
Here's how to make it:
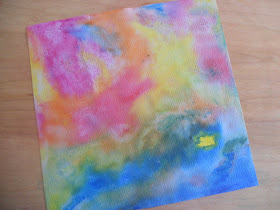
 1) Have your cute little kid paint the paper with watercolor paints. Be sure to paint both sides. You really must try these Aquacolor crayons...
 I love them because they're easy to use and the colors remain vibrant after drying.
 2) While you're waiting for the painting to dry, prep the dowel by lightly hammering in the nail approximately 1 inch from the top. Now remove the nail - all you're doing is creating the hole for the pin. This will make hammering the pin in much, much easier.
 3) Once dried, use your ruler to draw straight lines diagonally from one corner of the paper to another, creating a big X.
 4) Using your pencil, lightly label the square as I've shown above.
 5) Cut each line only 3 inches toward the center.
 6) Fold the labeled corners toward the middle.
 7) Poke the ball pin through the paper.
 8) With the pin poking through the front of the paper, place the bead onto the pin behind the paper. This will create a spacer between the pinwheel and the dowel.
9) Holding the bead in place, guide the pin into the prepared hole on the dowel and gently hammer the pin into the dowel. Make sure it's secure.
A couple of notes from the trenches:
::Keep in mind this lovely pinwheel isn't as sturdy as the store-bought plastic ones, so you may find it doesn't last as long.
::Crayons and cardstock would be a great alternative to watercolor paper and paint.
::Please be mindful of small children who may be interested in pulling out the pin. This hasn't been a problem for us, but I felt the need to point it out. :)
I'm linking this post up to some great blog parties - check them out here.
Oh I just love the watercolor on this pinwheel. It is so vibrant and vivid!
ReplyDeletePin wheels are so much fun. Thanks for the tutorial.
ReplyDeleteHow fun! We've been planning on doing this for awhile...thanks for the nudge! I love the watercolours in your pinwheels :-)
ReplyDeleteoo love this! I just bought my first pack of watercolor paper last week :-) We might just have to try this out!
ReplyDeleteThanks for sharing this. I'll have to give it a try with my kiddos, I'm sure they will enjoy making them almost more than playing with them, lol.
ReplyDeleteLOVE THIS! My son has been obsessed lately with the plastic dollar store pinwheels that litter our walk to the playground each day so this post comes just in time!
ReplyDeleteI have been wanting to make a pinwheel! Thanks so much for this. Beautiful!
ReplyDeleteThis looks so easy maybe even I could do it?! Love the colors in James' painting and your photos assist the tutorial so well. THANK YOU for this!
ReplyDeleteThis pinwheel turned out so pretty! I love the watercolors and bet they look beautiful spinning! As always, you are very inspirational, Mari-Ann!
ReplyDeleteThis is such a beautiful project! My daughter is a little young to make it herself (18 months), but I might just have to make her one to play with this afternoon! It's my first time stopping by, and I have to say, your blog is beautiful and very creative.
ReplyDeletegreat project...thanks for sharing.
ReplyDeleteI just did this the other day with my boys! It took me a minute to remember how since I have been out of the classroom for 4 years now, but I got it! Yours is much sturdier and pretty though...
ReplyDeleteI used to do this with my class when we learned about the wind. I am going to link this over on kid kapers. it is a great sprintime activity.
ReplyDelete