Showing posts with label Tutorials. Show all posts

Thursday, February 17, 2011

Homemade Playdough Recipe & Notes

There are tons of homemade playdough recipes out there and so really all I'm doing here is adding to the pile. :) But, I can tell you that I've tried quite a few of those recipes and the one I've detailed below is my absolute fav.

*I give full credit to My Montessori Journey for this recipe. I've decided to replicate it here because I have a few "notes from the trenches" to add to it.*

Homemade Playdough Recipe
Ingredients:
1 cup Flour
1/2 cup Salt
1 tablespoon Cream of Tartar
1 tablespoon Cooking Oil
1 cup Water

Directions:
1. In a medium sized bowl, combine all dry ingredients and mix well. Add wet ingredients to bowl and, again, mix well.

2. Add contents to a large pan and cook over medium-low heat, stirring constantly until it forms a ball.

3. The dough is ready when the mixture pulls away from the pan and when the wet parts begin to look dry.

4. Turn the dough onto your countertop and knead it until smooth. It will be quite warm to the touch, so be careful!

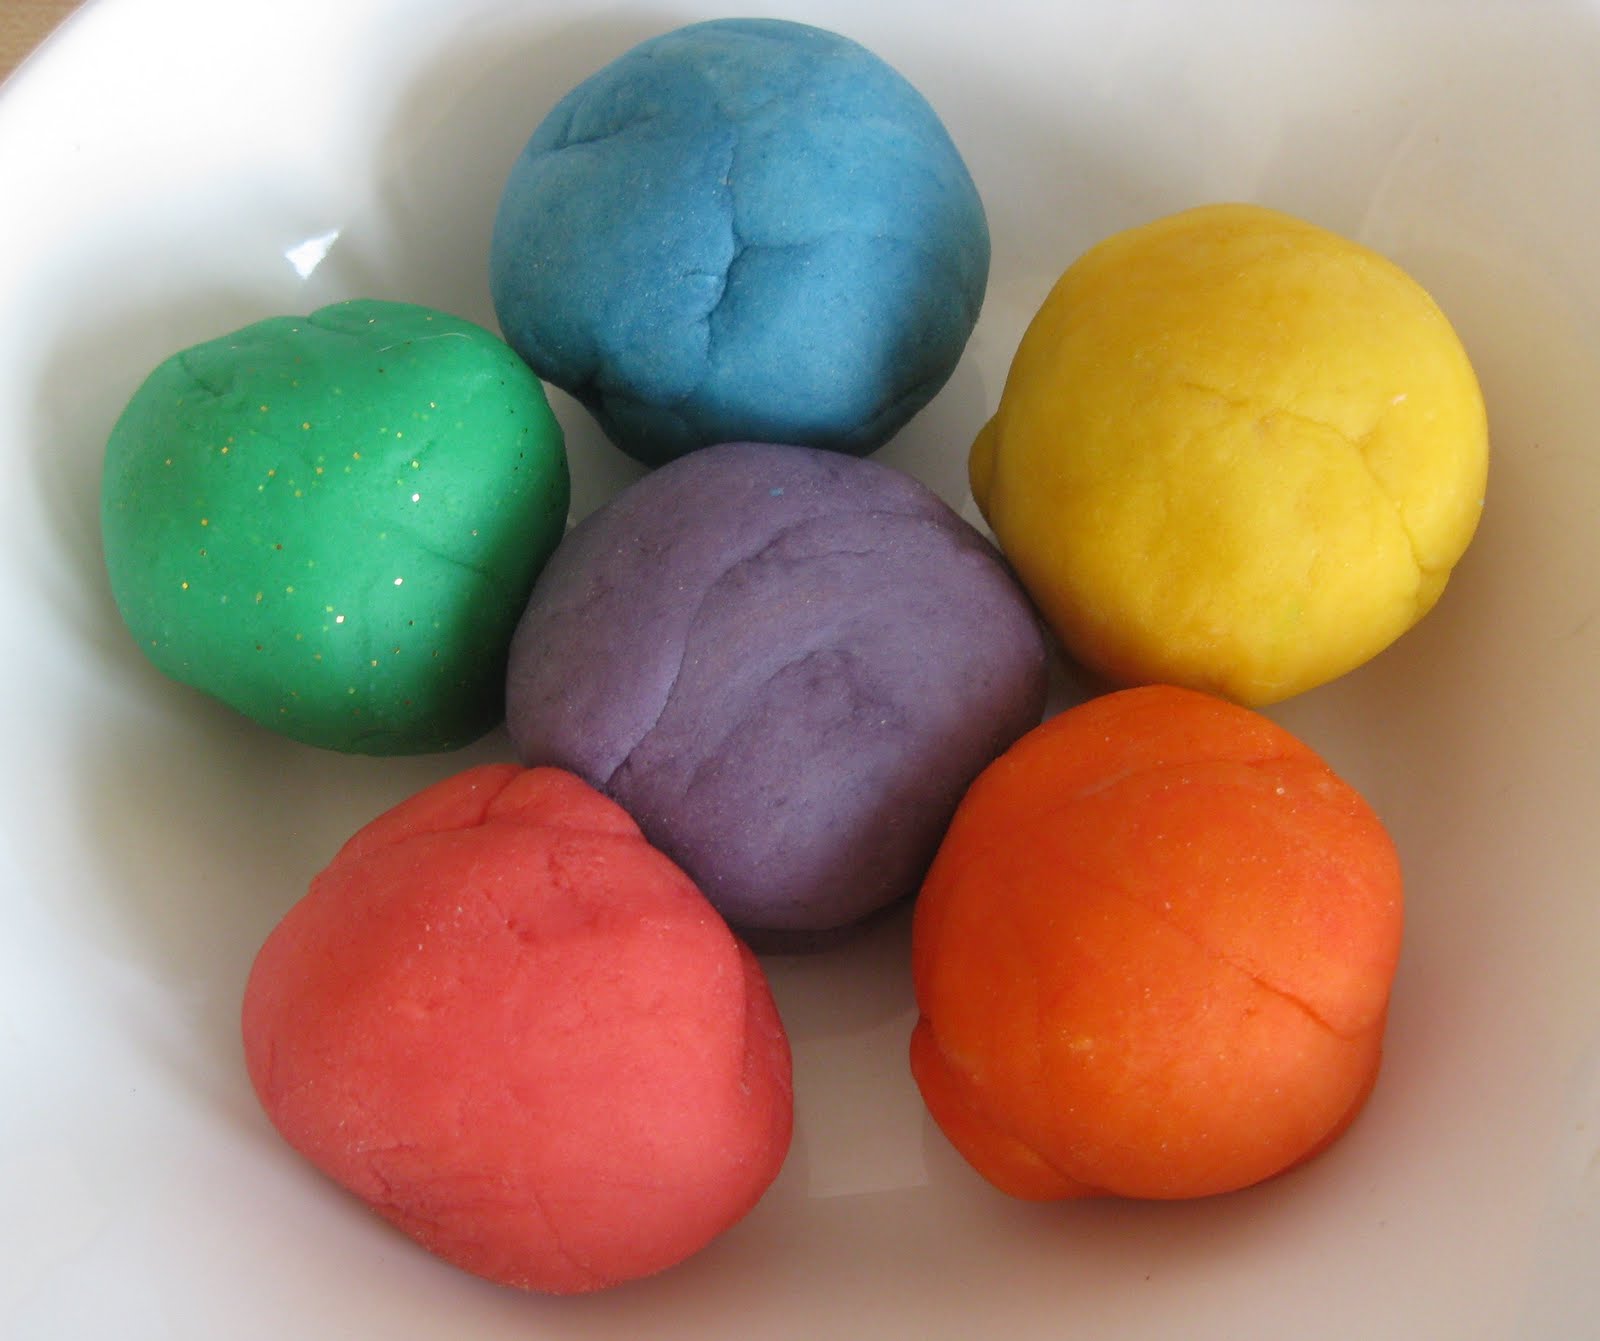
5. Add food coloring, glitter, extracts, etc. AFTER the dough has cooled. The color and scents won't "take" as well when the dough is hot/very warm.


Notes from the trenches:
Re the ingredients, I use an off-brand of salt - it's cheaper and let's face it, when you're using a 1/2 cup each time, you don't want to/need to be using high quality stuff. A lot of people aren't sure what Cream of Tartar is - it's a white powder, very common, found along with all the other spices in your grocery store. UPDATE: A reader wrote in with the tip that lemon juice could replace Cream of Tartar in the event you don't have it on hand.

I like to use gel food coloring, such as this kind, because I find it comes in a wide variety of "unusual" colors (e.g. black, navy blue, hot pink) and a little goes a long way. The everyday McCormick brand is good too.

When it comes to storing the dough, I find it best to keep it in a Ziploc container or bag in the refrigerator. In this way it'll last months. I know some folks keep theirs out at room temp and it maintains its original state perfectly fine. I'm assuming it's because of Bermuda's constant humidity that mine turns to goo after a few hours of sitting out.

It's time to toss the dough out when it starts to look dry and crusty or when it gets very sticky and gooey. What you want it a nice, smooth, elastic consistency.

If you choose to add glitter, please note you'll need A LOT of it. This is a situation where a lot of glitter goes only a little way.

UPDATED: Imagination Tree shared the tip that a few drops of glycerin (which can be purchased at a craft or cooking store) makes the dough wonderfully stretchy and smooth.

I make a new batch of playdough each month. You can click the links below to go to the actual posts to see how we used the dough. You can also view a slideshow of our dough here on my Counting Coconuts Facebook page.

Our Playdough Themes
January: Space
January: Snow
February: Chocolate - two links: here and here.
March: St. Patrick's Day and Easter eggs
March: Weather
April: Rainbow
May: Gardening
May: Robot
July: Independence Day
July: Beach
August: Ice cream
September: Apple pie
October: Halloween - two links: here and here.
November: Turkeys
December: Christmas - two links: here and here.

Happy dough making!


~Thank you for your comments!~

Thursday, November 18, 2010

Our Continent Bags - Storage

Earlier this week I wrote about our continent bags and now I want share with you how I store the items inside of the bags.

For each bag there are a few 3-part card collections as well as various sets of photos, postcards, maps, etc. I knew I needed a way to keep everything organized and separate so I created some envelopes for each set.

First, the 3-part card envelopes. Admittedly, these are not the most perfect envelopes, but they get the job done. Whenever possible I try to avoid using plastic in our classroom mainly because I don't think it's aesthetically pleasing, but, since I needed quite a few of these and since I can't afford nor do I have the ability to make something like this, I had little choice. My dear friend, Susan, shared this link with me and I was inspired to create my own variation. UPDATE: Also visit Montessori Print Shop's excellent photo tutorial!

As you can see, I added a flap to one end and a little square of velcro to keep the envelope closed while its not in use. I used scrapbooking paper and kept in mind the coordinating continent colors. I added a label to the front of the envelope, too.

These were really easy to make and if you'd like to create your own, here's a quick tutorial:
1. Simply cut the paper based on the size of your 3-part cards.
2. Fold up the bottom (this will end up being the pockets).
3. Crease the paper lengthwise to create three sections.
4. If you'd like, create and adhere a label to the front cover of the envelope. I made a few of these without a label so I could use them for general use in the classroom.
5. With just the bottom folded, put the paper through a laminator.
6. Cut away the excess plastic and refold the paper using the creases as a guide.
7. Using an Exacto knife, very carefully cut slits in the plastic just above the fold. Doing this will create the pockets.
8. Add a square of velcro to the front cover and to the word card section.

You'll notice the plastic does buckle/bubble a bit when folded. Like I said, these aren't perfect, but if you can look past that flaw you'll find they are a quick and cheap alternative.

I also made some very simple pockets using the same kind of fold, laminate and cut method. I really like how these turned out and I'm so glad to finally be putting some of my scrapbooking paper to use!

For the various loose object, such as animal figurines and souvenirs, I hand stitched some small drawstring pouches.

Lastly, I used basic pocket folders (the kind you can find at any office supply store) to store large paper items such as maps and information sheets. Again, I color coordinated these with the traditional continent colors.

I hope you found this helpful! You might also enjoy these other posts from my Continent Bag Series:
Our Continent Bags
Our Continent Bags - North America
Our Continent Bags - Asia
Our Continent Bags - Antarctica
Our Continent Bags - Europe
Our Continent Bags - Africa
Our Continent Bags - South America
Our Continent Bags - Australia

~Thank you for your comments!~

Friday, July 30, 2010

August Sensory Tub & Playdough - Ice Cream!

This tub makes me smile whenever I look at it - it's so soft and colorful and it's all about ice cream!!

Ice Cream Shoppe Tub
What's inside:
:: LOTS of colorful homemade pom-poms (aka scoops of chocolate, mint, strawberry and vanilla ice cream!)
:: Silicone cones - these were a surprisingly cheap find at a local store
:: Ice cream scoop and spoon
:: Little red beads - James calls these "cherries" :)
:: Small sundae cup and bowls
:: Sprinkles - because of ants, humidity and what's sure to be sticky fingers I'm keeping these sealed!
:: Wooden banana (for a banana split, of course!)

I saw this idea on Growing Up Our Style where Rebecca used tons pom-poms to fill up her sensory tub. I love her idea, but I didn't have enough poms on hand, so I had to make my own. Not that I minded at all - I look for any excuse to make something with my hands! At the end of this post I'll share with you a quick tutorial on how to make your own pom-poms. :)


3 Scoops of Spumoni Playdough
I had fun using up some of the food colors and flavorings in my stash. Here's what I used:
::Brown: cocoa (you could use root beer extract to simulate a root beer float!)
::Green: peppermint extract
::Pink: strawberry extract

This dough is so much fun to play with - James LOVES it! It smells delicious and the colors look so pretty all mixed together. :) Oh and bonus, all that tearing and pinching of the dough is excellent for strengthening those little fingers!

Now for the pom-pom tutorial. These are SO quick and easy peasy to create - each one took me only a minute or so to make. I remember making these with my sister when we were kids. This would be a fun activity for children who know how to cut and tie.

Here's what you'll need:
:: Yarn - this is a great way to use up leftover bits. I used whatever I had on hand, but I would recommend chunky weight yarn for these.
:: Sharp craft scissors
:: 5 inch piece of cardboard folded in half

Step one:
Wind the string around the cardboard. Using the chunky weight yarn, I wound approx. 25 times around.

Step two:
Cut the yarn and then cut another 6 inch piece of yarn.

Step three:

(apologies for the blurry photo)
Slide the yarn "ball" off of the cardboard, being careful not to unravel the loops. Gently center it on top of the 6 inch piece of yarn.

Step Four:
Use the 6 inch piece of yarn to tie a tight double knot in the center of the yarn "ball".

Step Five:
Using your scissors, cut the loops - make sure you DO NOT cut the knot you created in Step Four.

Step Six:
Trim and fluff the edges so they are all fairly even. That's it! You now have a happy little pom-pom!

I'm linking this post up to The Preschool Corner, Tot Tuesdays, Montessori Monday, We Play and Creative Friday.

~Thank you for your comments!~

Monday, June 7, 2010

Pinwheel Tutorial

Sometimes when we go to the ocean we'll bring a pinwheel along and watch the wind chase through it. The store-bought pinwheel we had has since become tattered so I decided we'd make another one ourselves.


This was fun and easy to do - you should make one, too!
Here's what you'll need:


:: Glass of water
:: Some watercolor paints (we used these amazing Aquacolor crayons)
:: 1 sheet of watercolor paper cut to 7" x 7" in size
:: Paintbrush
:: 12 inch wooden dowel
:: 1 wooden bead (I have two pictured, but ended up using only one)
:: 1 ball pin (I used one from my sewing stash)
:: Scissors
:: Ruler
:: Pencil
:: Hammer
:: Small nail (not pictured)

Here's how to make it:
1) Have your cute little kid paint the paper with watercolor paints. Be sure to paint both sides. You really must try these Aquacolor crayons...
I love them because they're easy to use and the colors remain vibrant after drying.

2) While you're waiting for the painting to dry, prep the dowel by lightly hammering in the nail approximately 1 inch from the top. Now remove the nail - all you're doing is creating the hole for the pin. This will make hammering the pin in much, much easier.

3) Once dried, use your ruler to draw straight lines diagonally from one corner of the paper to another, creating a big X.

4) Using your pencil, lightly label the square as I've shown above.

5) Cut each line only 3 inches toward the center.

6) Fold the labeled corners toward the middle.

7) Poke the ball pin through the paper.

8) With the pin poking through the front of the paper, place the bead onto the pin behind the paper. This will create a spacer between the pinwheel and the dowel.

9) Holding the bead in place, guide the pin into the prepared hole on the dowel and gently hammer the pin into the dowel. Make sure it's secure.

That's it! You now have a pretty, homemade pinwheel!
A couple of notes from the trenches:
::Keep in mind this lovely pinwheel isn't as sturdy as the store-bought plastic ones, so you may find it doesn't last as long.
::Crayons and cardstock would be a great alternative to watercolor paper and paint.
::Please be mindful of small children who may be interested in pulling out the pin. This hasn't been a problem for us, but I felt the need to point it out. :)

I'm linking this post up to some great blog parties - check them out here.

Monday, May 31, 2010

Homemade Spinny Speller Tutorial & Giveaway (CLOSED)

~This giveaway is now closed~

I first learned about Spinny Spellers while shopping online in the lovely, but now closed store, Let's Explore. Spinny Spellers are basically blocks on a dowel with letters printed on them. The child spins the blocks around to create basic cvc (consonant-vowel-consonant) words.

Such a fun and simple idea, right? That's what I thought. Then my next thought (as it often is whenever I think about buying something) was - can I make this myself?

I realized I could and after a trip to the craft store I had all the materials I needed to make James a homemade Spinny Speller:

Here's what I bought:
:: Three small 1 inch wooden blocks
:: Two round wooden knobs with pre-drilled holes
:: One 1/4 inch thick wooden dowel

Here's what I did:
I asked my love if he'd very sweetly drill holes into the center of the blocks for me. He, always looking for a good excuse to use his power tools, very sweetly agreed. :) After some trial and error, he finally decided on using the 5/16th drill bit. He also cut the dowel down to 5 inches.

After the holes were drilled, I sanded the blocks to smooth the pointy edges.

Next, I hand painted the blocks using these awesome water soluble crayons.

Then I hand wrote the letters onto the blocks using a permanent marker. I researched common cvc words and decided on the following letters:

::block one: b, c, h, m
::block two: a, e, o, u
::block three: d, g, p, t

This makes quite a few "real" words and several "nonsense" words as well. For us, the point of the Spinny Speller is really just to teach James how to connect the sounds of letters and to realize that in doing this a word is created. Once he gets the hang of that the Spinny Speller will be used as a fun and easy reading tool.

Finally, after the blocks were painted and printed on, I slid them onto the dowel and capped each end of the dowel with a bit of glue and the round wooden knobs.

And that was it! Easy-peasy!!


Of course while I was making this I thought of all you lovely mamas and teachers and decided to make an extra one to give away to one of you! And, as it happens, I have materials still left over after making two Spinny Spellers and I think I'll be whipping up a couple more for birthday gifts as well. :)

So. If you're interested in winning one of my Spinny Spellers (which I'll send in one of my handmade gift bags), please do the following:

:: Leave a comment letting me know what is your child's favorite learning tool. (This could include art and music materials. I'm always looking for interesting things to use with James and I think this could be a great way to share our ideas with one another!)
:: Follow Counting Coconuts and leave me a separate comment letting me know you're following.
:: Blog about this giveaway and leave a separate comment letting me know you've blogged about it.

The giveaway will end at 11pm (Atlantic Time) on Friday, June 4th and Mr. James will randomly choose a winner the following morning. This giveaway is open to everyone - I'll ship anywhere in the world. :)

Thursday, April 29, 2010

May Day Basket Tutorial

I have to be honest, I never knew much about May Day other than the fact that it lands on my birthday. My hippy mama, God rest her soul, thought it was really groovy that I was born on May Day, in the bicentennial year, and that it snowed that day, too (gotta love Minnesota weather!). She chose "May" as my middle name, declared me her "flower child", and, when I was a bit older, taught me how to make daisy chains to wear in my hair. I have so few memories of my mother since she passed away when I was young, but this is one I hold dear to my heart.

{sorry, got carried away on nostalgia for a minute there - I do that sometimes ;) }

Anyway, after 34 years I finally got around to wondering what May Day is all about. I went online and found all sorts of interesting information. Click here and here to learn more if you're interested. Also, click here for some May Day craft activities.

Then, after seeing this post on the lovely blog, Childhood Magic, I decided to make some May Day baskets with James. The tradition of May Day baskets is a sweet one - you make baskets, fill them with flowers or other goodies, and leave them on the doorknobs of your neighbors and loved ones. :)
Here's how we made ours:

First we prepared our materials - we painted with watercolors. James LOVES to paint!

A masterpiece in the making!

Then, after the paintings had dried, I cut two of our papers into lengthwise strips. This was kind of hard to do actually, because the artwork was so pretty!


And then, channeling my daisy chain training, I began weaving. I wove some strips painted-side out and some the other way around so there would be color all over the basket (in hind-sight, I would've had James paint both sides of the paper). James tired quickly of the whole weaving thing, although he got the "over-under" concept perfectly. Instead, he sat on a chair beside me and watched happily, making cute little observational comments the whole time ("that's paper, mama!" "that's a beautiful basket, mama"). :)

I glued the the strips of paper as I went along.

Once I created the bottom of the basket, I folded up the ends to create the sides of the basket.

Then I began weaving the sides - I started by looping one of the strips around and gluing each side of it. This provided some stability and the strip didn't un-weave as I continued.

Since the strips weren't long enough to go around the entire basket, I had to join two strips together, cutting the excess once I reached the end of that round.

When I reached the top I trimmed the edges so it was all even.

For the handle, I glued to strips together (for sturdiness) and then split the bottom part of them so there was a piece on either side of the basket. Later, I stapled it for extra security.

We let it dry for a few hours and then Voila! we had ourselves a sweet little basket! We filled it with beautiful flowers from our yard.

Happy May Day!

Tuesday, March 30, 2010

Wax Painting Easter Eggs

This is a very special egg decorating method that's dear to my heart - I'll call "wax painting". Painting eggs with melted crayon wax is a tradition that's been in my family for generations. My mother taught my sister and me how to do it and it was a family tradition until she passed away in 1988. Up until yesterday it had been 22 years since I decorated eggs this way. It was bittersweet to revisit this old tradition and it took me right back in our tiny kitchen in Minnesota. I was happy share our little family secret with my niece and now I'll share it with all of you, too...

Update: My Aunt recently posted a video tutorial on YouTube - click here to view it.

Here's what you'll need:

::LOTS of crayons
::A muffin tin (we used a 12 cup tin)
::A roasting pan (or any shallow pan that's larger than the muffin tin)
::Pencils (enough for each person)
::Flat head pins (enough for each pencil)
::Clean, cool, and dry hard boiled eggs
::Water

Begin by peeling all the crayons

Then group them into color families

Stick the pin into the eraser on the pencil. This will be your "paintbrush".

Pour hot water into the roasting pan and place the crayon-filled muffin tin inside of it.

Place the pan over a burner on your stove top and heat on medium-low. Once the crayons are good and melted, you can turn the burner down to just a simmer.

::Now, this next part is a bit tricky, so if you find it doesn't work for you straight away, don't give up - it takes some of practice!::

Using your "paintbrush", dip the head of the pin into the melted color of your choice and very quickly drag the pin across the egg, tipping the pin to the side while you do this. The key is to move quickly because it takes seconds for the wax to harden onto the pin instead of onto the egg. The beauty is, if you make a mistake you can easily scrape off the wax and try again. {Tip: to remove the excess wax that will eventually accumulate on your pin, simply dip the pin into the hot water on the outside of the muffin tin.}

This starburst pattern was a favorite of my mother's, but you can experiment with any kind of design you can think of.

You can also dip the entire egg into the wax. (Be careful though -the wax is hot!)


After you've finished decorating your eggs, let the wax harden a bit and then place the entire tin in the freezer. About an hour later you'll have some new crayons! I plan on putting these in James' Easter basket. :)

I should mention that at our little egg decorating party, we used a variety of methods, too - wax and sticker resistance, dye, sponge painting, glitter, and markers.

What a pretty basket of goodies!

James really got into this - I think he'll have green hands for the rest of the week!

LinkWithin

Related Posts with Thumbnails